When rving in the summer months, you need something more powerful than a cold drink to keep you cool, especially if you are going south.
The RV air conditioner will make a life change and help you go through hot summer days parked.
Generally, having more BTUs alongside lower power consumption is beneficial when it comes to RV air conditioners.
Here is the selection of the best RV conditioner models you find on the market.
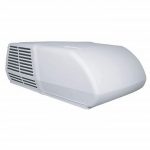
Dometic B57915.XX1C0
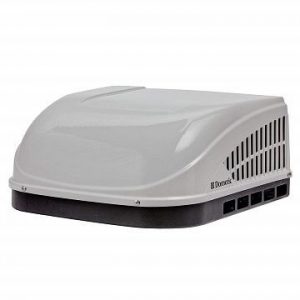
The Dometic RV air conditioner is on the top of my list for solid reasons.
With the 115-volt AC power, and 13.500 BTU (British Thermal Units), this AC is powerful enough to tackle the most extreme temperatures.
The unit is quiet because it has dampened brackets, alongside the compressor.
Therefore, Dometic AC has a quieter performance and makes less vibration.
The device is also relatively lightweight but powerful.
Pros
- Reliable performance
- Excellent customer service
- 2-year protection + warranty
- Great power
Cons
- Rooftop profile makes it less energy-efficient
 Dylan's Take
If you are looking for an RV AC that delivers great value for the money, the Dometic unit seems like a smart choice.
It will keep you cooled and comfortable at a great price.
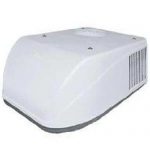
Airxcel Coleman Mach 08-0080 Mach 15
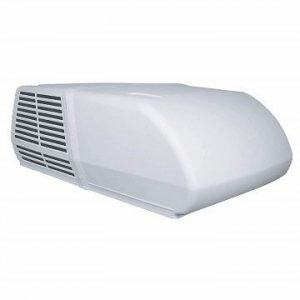
The Coleman AC has a 1/3-HP fan motor, which is pretty impressive for an RV air conditioner.
The airflow the device provides is 325 cubic feet per minute, and the cooling capacity is 15.000 BTUs.
Conveniently, if you want a versatile device with a heating function, you can buy an electric heat kit separately and install it.
The AC has a high profile and stands a bit tall on the roof.
Therefore, I recommend it for larger RVs and models with ducted AC systems.
The device is moderately loud.
Pros
- High-quality
- Durable
- Consistent results in all weather conditions
Cons
- Heavy
- High profile
 Dylan's Take
If you travel year-round, and you need a reliable AC, this Coleman is perfect.
It is affordable, upgradeable, easy to install, and delivers excellent performance.
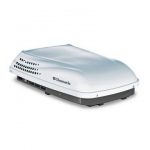
Dometic Penguin HP 651816
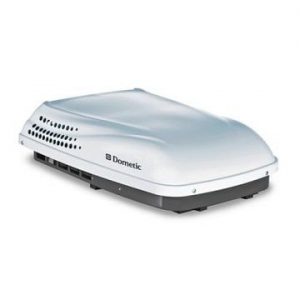
The Dometic Penguin AC has 15.000 BTU ratings and comes with the pre-installed multizone control unit.
Because of it, the AC is compatible with multizone thermostats.
It is sleek and stylish because it has a low profile, which in the long run lowers gas expenses.
The AC is slim but quite a heavy machine.
Pros
- Includes Dometic AC 2-year warranty
- Customizable
- Available in black and white
Cons
- High amperage rating
 Dylan's Take
The Penguin model by Dometic is an excellent investment for large RV owners.
In terms of power, use and quality, there aren’t many competitors on the market.
Coleman 47201A876
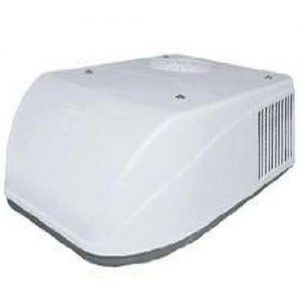
This air conditioner by Coleman is better suited for low-power systems.
It works on only 115 volts and has an amperage rating of 8.9 amps.
The unit delivers 9.200 BTUs of cooling power, s it is a better option for small RVs.
You can also use it as additional AC in large vehicles.
Pros
- Energy-efficient
- Includes 2-year warranty
- Great customer service
Cons
- Medium power
 Dylan's Take
Overall, the Coleman AC delivers moderate cooling power and is better for small RVs.
It is energy-efficient and won’t raise gas costs.
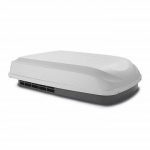
Dometic Penguin II 640315C
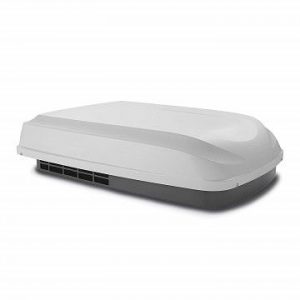
The Penguin II with high capacity power is a substantial purchase that not every RV-owner needs.
Consider your needs before you decide to get this AC.
It is suitable for people who frequently travel into extreme climates, both cool and warm.
The unit is available in black and white and has a convenient low-profile to save fuel.
Pros
- High power
- Energy efficient
- Built-in heater
Cons
- Pricey
 Dylan's Take
The Penguin II comes with a pre-installed module board which simplifies the installation.
Overall, it is a powerful beast that will certainly keep you comfortable during hot days.
Buying Guide
The market offer nowadays is great, so you can excellent air conditioners at affordable prices.
Modern RVs come with standard AC units, but often the unit isn’t suitable for cooling your RV at extreme temperatures.
However, there are so many models and options on the market, so it can be difficult to pick the right model for you.
Additionally, each unit has comprehensive technical specifications that most people find confusing.
There are so many factors that determine which model is the best for you.
Before you start deciding on a portable AC unit, let’s first discuss the differences between standard and portable RV air conditioner systems.
RV AC Systems
You can choose between a traditional portable unit and a rooftop air conditioner for an RV.
Both can be powerful and effective in cooling your RV, but portable device takes more space.
Window AC units are small but quite new on the market.
Therefore, we are still unsure whether these devices are worth the investment.
In most cases, the rooftop air conditioner is the most practical for RV owners.
Still, there are so many options in this category as well, so let’s see more about options and features to consider.
Size
The first thing to consider is if you are buying rooftop AC for the first time or replacing the old one.
If you are replacing the old one, you need to find the one that is of the exact size to fit into the existing mounting hole.
The height is important for a few more reasons.
Think about bridges in transit, your garage height, and other similar things.
It is always a safe choice going for a slimmer model.
Also, large units affect aerodynamics, so gas consumption will increase.
It will eventually lead to higher costs.
Even though slim models are pricier than high-profile units, slimmer ones are better in the long run.
However, smaller devices are less powerful.
Power
Power is the second thing you need to consider.
The power of an RV AC is expressed through British Thermal Units – BTUs.
Standard AC has the power of 13.500 BTUs, but owners of large RVs might need something more powerful.
Additionally, if you travel to hot places, you need something like Coleman Mach 14 with a power of 15.000 BTUs.
The power also depends on how much time you spend in RV.
If you only use it occasionally, you will be good to go with standard power.
If you live full-time in your RV, consider investing in powerful AC.
Do I Need Additional AC for RV?
Still, you aren’t sure if one AC system is enough to keep you cool, you might be right.
One RV AC is enough for RVs with space under 32 feet.
If you own a larger vehicle, consider getting an additional one.
Also, think about the color of your RV.
Dark RVs attract more sunlight and are generally hotter than white RVs.
RV Air Conditioners Types
Let’s now discuss RV AC types, so you can find the best one for you.
Ducted and Non-Ducted
This depends on your RV.
Check the installation of your vehicle, and get AC that can be safely installed with your RV.
Non-ducted systems have compressors, condensers, and blowers.
They blow cool air into your RV.
Ducted systems operate differently.
They are installed with your duct system, so they distribute the air through ducts in RV.
Ducted RV ACs are more powerful and consume less energy.
Rooftop or Portable
Portable AC isn’t a good choice for a small RV.
If sacrificing space isn’t an issue for you, thank you can go with portable AC.
It is easy to install and use.
Rooftop AC is a practical and space-saving option that most RV owners will appreciate.
Heat Pumps
Heat pumps are a great choice for all-season campers.
Some RV AC units have built-in heaters, which allow you to use them year-round.
Others can be upgraded and have separate heating kits.
However, heat pumps are a bit costly.
Power Consumption
Power consumption is an important factor to consider, especially if you are a full-time traveler.
ACs that consume less power are practical and highly desirable by every RV owner.
They provide the exact cooling power but have lower amperage ratings.
Accessories
The first accessory you should consider is the cover for your rooftop ACs.
It is practical because it keeps the device safe from outer factors, so it can prolong the unit’s life.
However, a cover shouldn’t be used when you are in transit.
So, if you stay long in one place, an AC cover is a useful accessory for you.
The thermostat is also a great thing to have around.
You connect it with your AC and it adjusts the temperature you desire.
Thermostats improve the use of your AC in terms of energy efficiency.
They also simplify the setting and efforts of using an RV air conditioner.
You don’t have to turn on and off the system to reach the desired temperature.
The thermostat is affordable, but can significantly improve the use and performance of your air conditioner.
Replacement Air Filters
RV ACs are self-sufficient once you install them properly.
However, once you notice deterioration in cooling power or excessive noise, it is time to replace the air filters.
Air filters aren’t pricey and are easy to replace by yourself.
I recommend you buy a few replacement filters have in the stack when you are on the road.
The alternative is washing and rinsing your filters, but you might end up tearing the filters down.
RV ACs Installation
Installation of an RV air conditioner requires only basic tools.
It might seem intimidating, but it is easy to do.
Here is a step-by-step guide on how to install a rooftop AC unit.
Removing Old Unit
The first thing to do is to replace the old air conditioner.
I recommend you first go through instructions for your specific air conditioners.
Turn off the RV electrical power.
Remove the shroud from the RV top.
Go inside your RV and get access to the control panel and remove it.
Remove the faceplate using a screwdriver.
Find where the bolts that connect AC to the rooftop are and loosen them.
Check the electrical wiring under the faceplate and find live, neutral, and ground wire.
Twist the wires via wire nuts and disconnect every electrical connection.
Go on the top of your RV and use a putty knife to loosen the adhesives used to connect the old unit to the roof.
Remove all nuts that keep the unit secured.
Usually, there are four main nuts.
Remove the AC unit from the roof.
As these are heavy, you will need a help of a friend to lift the unit and remove it from the top.
Installing New Unit
Read the instructions thoroughly.
Clean the rooftop as it can have a lot of dirt and debris from the old unit.
Get your friend to help you bring the new AC to the top.
Never try to lift it on yourself, to prevent injuries, because rooftop ACs are very heavy.
Set the new unit on the same mounting hole you used for the old device.
Seal the seam fully with a caulk gun.
Make sure there aren’t any leaks that will access the effectiveness of your device in the future.
Thread the bolts back into the AC and secure them to the roof.
Tighten them from inside the vehicle to ensure proper connection.
The next thing to do is to connect the wirings.
All wires are color-coded.
White is neutral, red or black is a live wire, and the ground wire is bare in most cases.
Match the wiring with a new device, twist the ends and connection, and screw the wire nut.
Screw the faceplate and attach the cover.
Then, test everything.
Turn the RV on and try your AC.
It should give you a blast of cool air.
If something isn’t working properly, check the guide and go through every installation step to check if you have done everything correctly.
Repeat some steps if necessary.
Conclusion
There you have a complete buying guide for RV ACs!
You can check my recommendations and use my tips to choose the best one for you.
Reading reviews is always a great way to get insights into the device’s quality and durability.
Rooftop systems are always a great choice, but find the one that matches your needs and RV habits.
Best Overall Choice
Dometic B57915.XX1C0
We're a team of professional travelers, on-the-go freelancers, web producers, writers and editors. Our mission is to pick the best travel gear by analyzing customer opinions and writing our own findings to help you find the right products for you. Please share our posts to help us grow. Read more...
